Table of Contents
Are you tired of using conventional cutting methods that are time-consuming and labor-intensive? Look no further than a CNC water jet! Building a CNC water jet may seem like a daunting task, but with the right guidance, anyone can do it. In this article, we will provide step-by-step instructions on how to build a CNC water jet, from selecting the right components to assembling the machine. So, let’s dive in and discover how to create a powerful and precise cutting tool that will revolutionize your manufacturing process!
- Start by gathering all the necessary hardware, including a water jet cutter, computer, and water pump.
- Assemble the water jet cutter according to the manufacturer’s instructions.
- Install the computer software and connect it to the water jet cutter.
- Install the water pump and connect it to the water jet cutter.
- Test the system to ensure everything is working properly.
How to Build a CNC Water Jet?
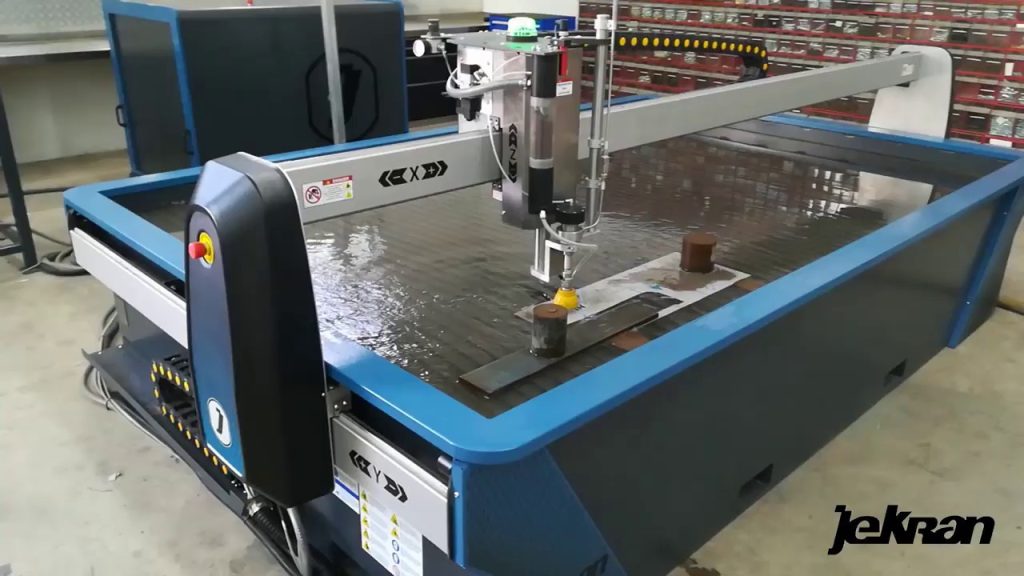
If you’re looking for a way to cut through materials such as metal or stone with precision, a CNC water jet may be the perfect tool for you. A water jet uses a high-pressure stream of water mixed with an abrasive material to cut through various materials with ease. In this article, we’ll take a look at the steps involved in building your own CNC water jet.
Step 1: Gather Materials and Tools
The first step in building a CNC water jet is to gather all the necessary materials and tools. You’ll need a water jet cutting head, a high-pressure pump, a water tank, a computer with CAD software, and various pipes and fittings. You’ll also need welding equipment and other tools such as wrenches, pliers, and screwdrivers.
Once you have all the necessary materials and tools, you can begin assembling your water jet.
Step 2: Build the Frame
The frame of your water jet is what will hold all the components together. You can build your frame out of metal or other sturdy materials. Make sure the frame is strong and stable enough to support the weight of the water tank, pump, and cutting head.
You may also want to consider adding wheels or casters to the frame so that you can move the water jet around your workspace.
Step 3: Install the Water Tank and Pump
The water tank and pump are the heart of your water jet. The tank holds the water, and the pump delivers it to the cutting head at high pressure. Install the tank and pump on your frame, making sure they are securely mounted.
You’ll also need to connect the pipes and fittings between the tank, pump, and cutting head. Use high-pressure hoses and fittings designed for use with water jets.
Step 4: Add the Cutting Head
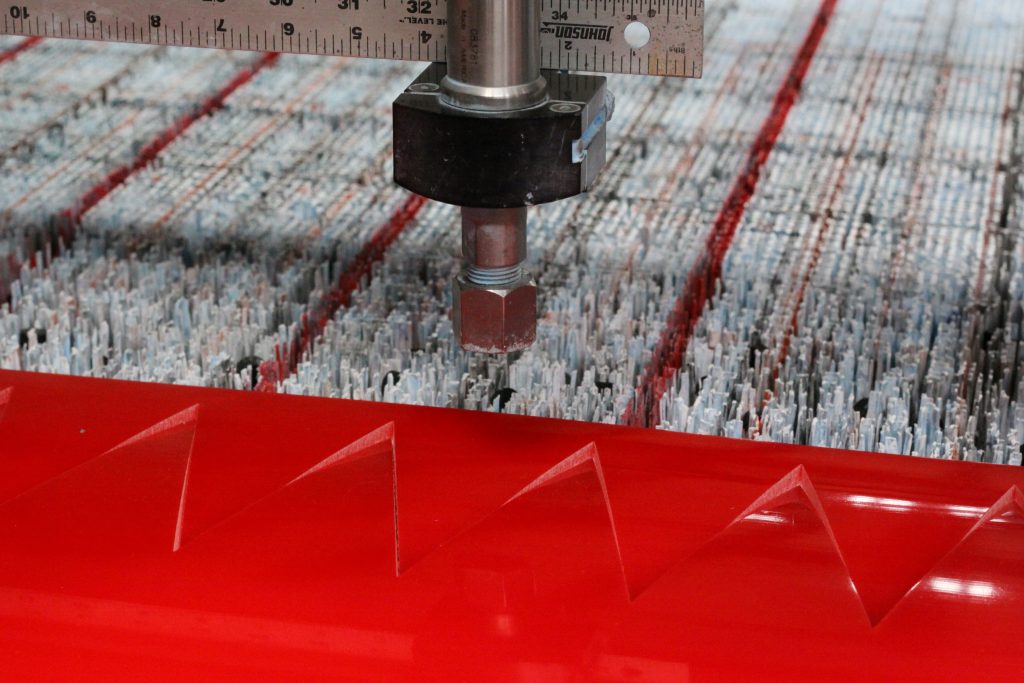
The cutting head is what directs the high-pressure stream of water and abrasive material onto the material you’re cutting. Install the cutting head onto the end of the high-pressure hose, making sure it’s securely attached.
You may also want to add a height sensor to the cutting head to ensure that the distance between the head and the material stays consistent during cutting.
Step 5: Connect the Computer and CAD Software
To control your water jet, you’ll need to connect it to a computer running CAD software. This software will allow you to create designs and control the movement of the cutting head.
Connect the computer to the water jet using a USB or Ethernet connection, and install the necessary software.
Step 6: Calibrate the Water Jet
Before you can start cutting, you’ll need to calibrate your water jet. This involves adjusting the pressure and flow rate of the water, as well as the speed and accuracy of the cutting head.
Follow the instructions in your water jet’s manual to calibrate the machine properly.
Step 7: Start Cutting
Once your water jet is calibrated, you’re ready to start cutting. Load your design into the CAD software and begin cutting.
You may need to adjust the cutting parameters as you go to ensure that you get the best results.
Step 8: Maintenance and Upkeep
To keep your water jet running smoothly, you’ll need to perform regular maintenance and upkeep. This includes cleaning the tank, pump, and cutting head, replacing worn or damaged parts, and checking the pressure and flow rate of the water regularly.
Benefits of a CNC Water Jet
A CNC water jet offers several benefits over other cutting methods. For one, it can cut through a wide variety of materials with ease, including metal, stone, and glass. It also produces clean, precise cuts without the need for secondary finishing processes.
Compared to other cutting methods such as laser or plasma cutting, a water jet is also safer and produces less heat, which can damage certain materials.
Conclusion
Building a CNC water jet may seem like a daunting task, but with the right materials, tools, and instructions, it’s a project that can be completed by anyone. By following the steps outlined in this article, you can create your own water jet that will allow you to cut through materials with precision and ease.
Frequently Asked Questions
In this section, we will answer some of the most commonly asked questions about building a CNC water jet.
What are the basic components needed to build a CNC water jet?
Building a CNC water jet requires several basic components including a high-pressure pump, a cutting table, a CNC control system, and a cutting head. The high-pressure pump provides the water at the required pressure, and the cutting table supports the material being cut. The CNC control system controls the movement of the cutting head and the cutting head itself cuts the material using a high-pressure stream of water.
Additionally, you will need plumbing and electrical components, software to control the CNC system, and a computer to run the software. It is important to ensure that all components are compatible with each other to ensure optimal performance of the CNC water jet.
What type of cutting head should I use for my CNC water jet?
There are several types of cutting heads that can be used for a CNC water jet, including pure water cutting heads and abrasive cutting heads. Pure water cutting heads are used for cutting softer materials like foam, rubber, and plastic. Abrasive cutting heads, on the other hand, are used for cutting harder materials like metal and stone.
When choosing a cutting head, it is important to consider the materials you will be cutting and the thickness of the material. You should also consider the accuracy and speed of the cutting head, as well as its maintenance requirements.
What materials can be cut using a CNC water jet?
A CNC water jet can cut a wide range of materials including metals, stone, glass, ceramics, plastics, foam, and rubber. The materials that can be cut depend on the type of cutting head used and the pressure and speed of the water jet.
It is important to select the appropriate cutting head and adjust the pressure and speed of the water jet based on the material being cut to ensure accurate and efficient cutting.
How do I maintain my CNC water jet?
Maintaining your CNC water jet involves regular cleaning of the cutting head and the cutting table, as well as monitoring the water quality and pressure. It is important to keep the water tank clean and free of debris and to change the water regularly to prevent buildup of impurities.
You should also inspect the plumbing and electrical components regularly to ensure they are functioning properly. Regular maintenance will help to extend the lifespan of your CNC water jet and ensure optimal performance.
What safety precautions should I take when using a CNC water jet?
When using a CNC water jet, it is important to wear appropriate safety gear including eye protection and gloves. You should also ensure that the cutting area is clear of any obstructions and that the cutting head is properly secured.
Additionally, you should be aware of the high-pressure water jet and the potential for injury. Ensure that the safety guards are in place and that the cutting table is secure. It is also important to follow the manufacturer’s instructions and recommendations for safe operation of the CNC water jet.
In conclusion, building a CNC water jet can be a challenging task, but it is a rewarding experience that can save you money in the long run. With the right tools, materials, and instructions, you can create a machine that will cut through a variety of materials with precision and ease.
First and foremost, it’s important to research and gather all the necessary components before beginning the build. This includes the frame, water tank, high-pressure pump, and cutting head. Once you have all the parts, follow a step-by-step guide to assemble your machine and test it thoroughly before using it on any projects.
In addition, don’t forget to take safety precautions when operating your CNC water jet. Wear protective gear such as goggles, gloves, and earplugs, and make sure to read the manufacturer’s instructions carefully. With proper maintenance and care, your CNC water jet can provide you with years of reliable and efficient cutting.
Request a quote today!
[contact-form-7 id="1578" title="Contact form"]
Please compress the file into a ZIP or RAR file before uploading. Alternatively, send through your RFQ by email.
enquires@unitymanufacture.com


