Table of Contents
- Frequently Asked Questions
- What is a gun drill, and why is it important?
- What type of chuck or holder is best for holding a gun drill?
- What is the proper technique for inserting a gun drill into a chuck or holder?
- What are some common mistakes to avoid when holding a gun drill?
- How can I ensure that my gun drill is performing optimally?
- MTDCNC talks Gun-drilling with the experts at Guhring
Holding a gun drill in a CNC mill might seem like a daunting task, but with the right technique and tools, it can be a straightforward process. Whether you are a beginner or a seasoned machinist, learning how to properly hold a gun drill will ensure the success of your CNC milling project.
In this article, we will discuss the steps and tools required to hold a gun drill in a CNC mill. From choosing the right tool holder to setting up the machine, we will guide you through the process to help you achieve accurate and precise results. So, let’s dive in and learn how to hold a gun drill in a CNC mill!
Step 1: Clean the collet and tool holder to ensure proper grip and alignment.
Step 2: Insert the gun drill into the collet and tighten with a wrench.
Step 3: Gently tap the drill with a mallet to seat it securely.
Step 4: Use a dial indicator to check the runout of the drill.
Step 5: Adjust the drill holder or spindle to correct any runout.
Step 6: Torque the holder to the recommended value.
Step 7: Test the drill by running a short program with a low feed rate.
Step 8: Adjust the program or tooling as necessary.
By following these steps, you can hold a gun drill properly in a CNC mill for precise and efficient drilling.
How to Hold a Gun Drill in a CNC Mill?
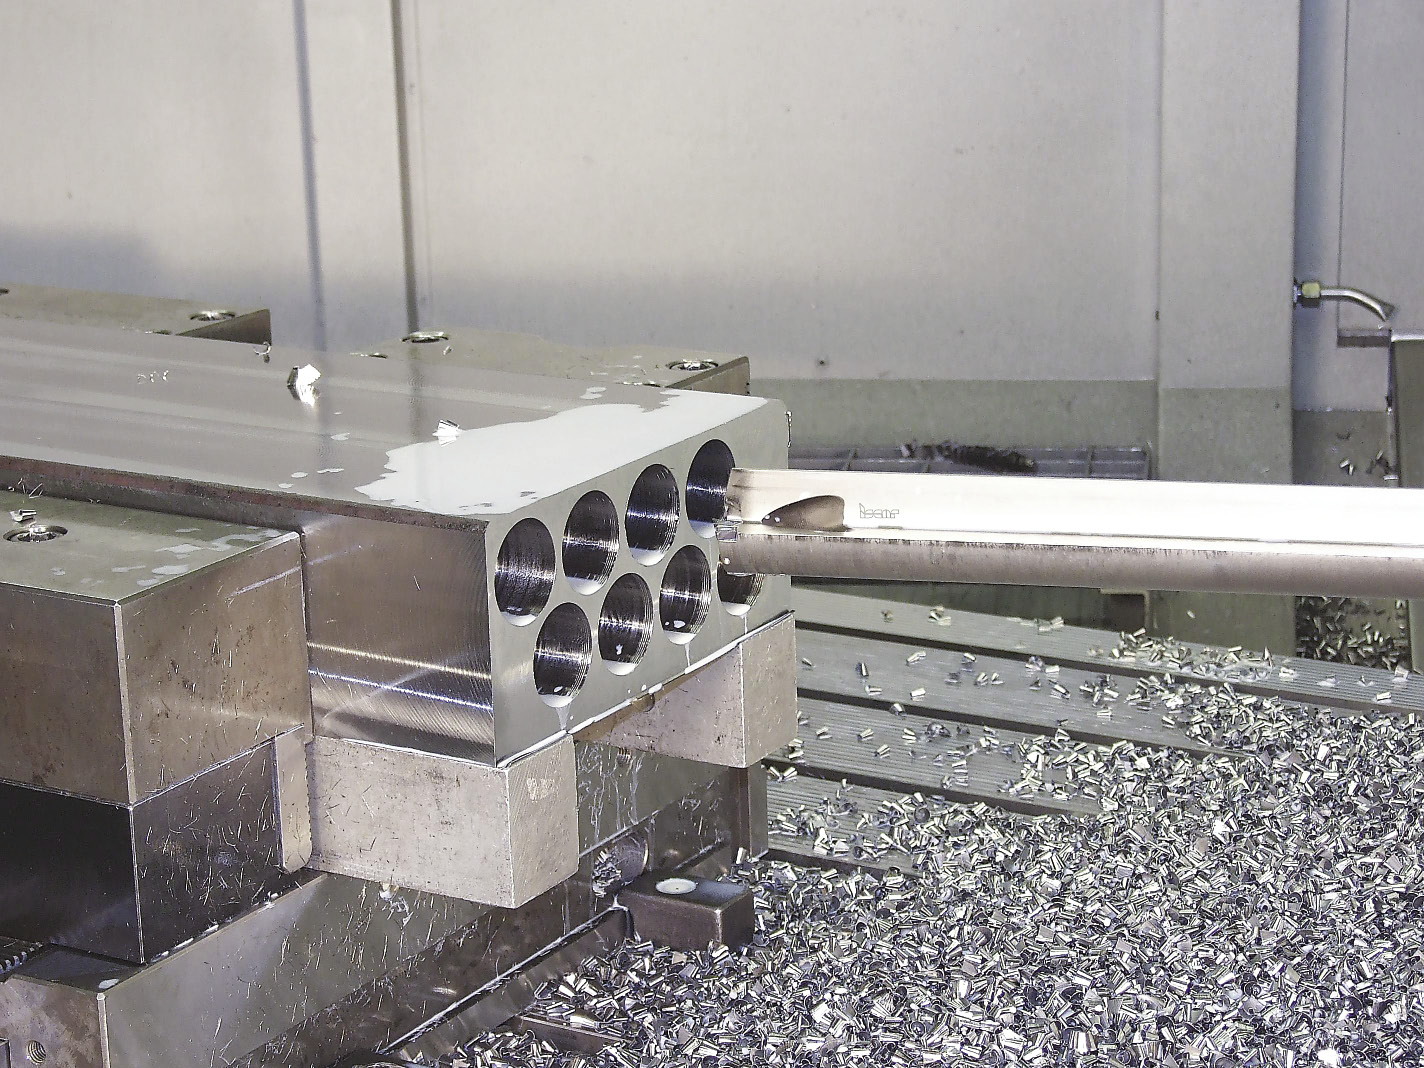
Gun drilling is a specialized process used in CNC milling for drilling deep, straight holes in materials. It requires a specific type of drill bit, called a gun drill, and a precise setup to ensure accuracy and consistency. In this article, we will discuss how to hold a gun drill in a CNC mill to achieve the best results.
Step 1: Choose the Right Gun Drill
The first step in holding a gun drill in a CNC mill is to choose the right drill for the job. Gun drills come in a variety of diameters and lengths, and the choice will depend on the size and depth of the hole you need to drill. It’s essential to select a high-quality gun drill that can withstand the high speeds and pressures required for gun drilling.
To ensure the best results, it’s also important to use a gun drill with the proper geometry. This includes the flute design, point angle, and helix angle, which can affect chip evacuation and tool life. Consult with the manufacturer or a gun drilling specialist to determine the best gun drill for your specific application.
Step 2: Set Up the Workpiece
Once you have the right gun drill, it’s time to set up the workpiece in the CNC mill. The goal is to ensure that the workpiece is secure and stable while allowing the gun drill to move freely and accurately.
One common method for holding the workpiece is to use a vise. The vise should be clamped tightly and aligned with the CNC mill’s spindle to prevent any movement during drilling. Depending on the size and shape of the workpiece, other methods may be used, such as clamps or fixtures.
Step 3: Prepare the Tool Holder
The next step is to prepare the tool holder for the gun drill. The tool holder is the component that holds the gun drill and connects it to the CNC mill’s spindle. It’s essential to choose the right tool holder for the gun drill and ensure that it’s properly installed and tightened.
One popular type of tool holder for gun drilling is the hydraulic chuck. This type of holder uses hydraulic pressure to grip the gun drill securely, providing maximum stability and accuracy. Other types of holders, such as collets or shrink-fit holders, may also be used, depending on the application.
Step 4: Install the Gun Drill
With the workpiece and tool holder prepared, it’s time to install the gun drill. This involves inserting the gun drill into the tool holder and tightening it securely. It’s important to follow the manufacturer’s instructions for proper installation, as this will ensure the best results and prevent damage to the gun drill or tool holder.
Step 5: Set the Cutting Parameters
Before beginning the gun drilling process, it’s important to set the cutting parameters. This includes the spindle speed, feed rate, and depth of cut. These parameters will vary depending on the material being drilled and the size and geometry of the gun drill.
Consult with the manufacturer or a gun drilling specialist to determine the best cutting parameters for your specific application. It’s important to start with conservative parameters and gradually increase them as you gain experience and confidence in the process.
Step 6: Start the Gun Drilling Process
Once the cutting parameters are set, it’s time to start the gun drilling process. This involves moving the CNC mill’s spindle and the workpiece to the correct position and initiating the drilling motion.
It’s important to watch the gun drilling process carefully and adjust the cutting parameters as needed. This will ensure that the gun drill is performing optimally and that the hole is being drilled accurately and cleanly.
Step 7: Monitor the Drilling Process
During the gun drilling process, it’s important to monitor the drilling process carefully. This includes checking for any signs of tool wear or damage, such as chipping or burning. It’s also essential to monitor the chip evacuation process to ensure that chips are being removed from the hole effectively.
If any issues are identified, stop the drilling process immediately and make any necessary adjustments to the cutting parameters or tool setup.
Step 8: Finish the Hole
Once the gun drilling process is complete, it’s time to finish the hole. This may involve using a reamer or honing tool to achieve the desired size and finish. It’s important to choose the right finishing tool and to follow the manufacturer’s instructions for proper use.
Step 9: Clean the Workpiece and Machine
After the gun drilling and finishing processes are complete, it’s important to clean the workpiece and machine thoroughly. This includes removing any chips or debris from the workpiece and machine and wiping down all surfaces to prevent contamination.
Step 10: Evaluate the Results
The final step in holding a gun drill in a CNC mill is to evaluate the results. This includes measuring the hole’s size and straightness and inspecting the finish for any defects or imperfections.
By following these steps and using the proper gun drilling techniques, you can achieve accurate and consistent results in your CNC milling operations. Consult with the manufacturer or a gun drilling specialist for any additional guidance or advice to ensure the best outcomes.
Frequently Asked Questions
When it comes to holding a gun drill in a CNC mill, many people have questions about the best practices and techniques to use. Here are five common questions and their answers to help guide you through the process.
What is a gun drill, and why is it important?
A gun drill is a type of deep-hole drilling tool used to create precise, straight holes in metal. It’s important because it allows for high-quality, accurate holes to be drilled quickly and efficiently, which is essential for many manufacturing processes. In a CNC mill, a gun drill is held in a specialized chuck or holder that supports the drill and guides it through the material.
When using a gun drill, it’s essential to follow the proper techniques to ensure accuracy and safety. This includes using the correct cutting speed and feed rate, selecting the right coolant, and maintaining the drill and holder in good condition.
What type of chuck or holder is best for holding a gun drill?
When holding a gun drill in a CNC mill, it’s important to choose the right chuck or holder to ensure optimal performance and accuracy. One common option is a collet chuck, which uses a series of tapered rings to grip the drill securely. Another option is a hydraulic chuck, which uses hydraulic pressure to tighten and release the drill.
Whichever type of chuck or holder you choose, it’s important to ensure that it’s properly sized for the gun drill and that it’s in good condition. You should also follow the manufacturer’s recommendations for installation and maintenance.
What is the proper technique for inserting a gun drill into a chuck or holder?
When inserting a gun drill into a chuck or holder, it’s important to take care to avoid damaging the drill or holder. First, ensure that the drill shank is clean and free of burrs or debris. Then, insert the drill into the chuck or holder until it reaches the stop or seating surface.
Next, tighten the chuck or holder according to the manufacturer’s recommendations. Be sure to use the correct torque and tightening sequence to avoid damaging the drill or holder. Finally, check the drill for runout using a dial indicator to ensure that it’s properly aligned in the chuck or holder.
What are some common mistakes to avoid when holding a gun drill?
When holding a gun drill in a CNC mill, there are several common mistakes to avoid. One is using the wrong cutting speed or feed rate, which can result in poor hole quality or damage to the drill. Another is using the wrong coolant, which can cause the drill to overheat or wear out prematurely.
Other mistakes to avoid include failing to properly clean and maintain the drill and holder, using worn or damaged components, and failing to follow the manufacturer’s recommendations for installation and use.
How can I ensure that my gun drill is performing optimally?
To ensure that your gun drill is performing optimally, it’s important to monitor its performance regularly. This includes checking for signs of wear or damage, as well as monitoring the hole quality and accuracy.
You should also follow the manufacturer’s recommendations for maintenance and replacement, including cleaning and lubricating the drill and holder, inspecting for wear, and replacing components as needed. By taking these steps, you can ensure that your gun drill is providing the best possible performance and accuracy for your CNC milling needs.
MTDCNC talks Gun-drilling with the experts at Guhring
In conclusion, holding a gun drill in a CNC mill requires careful preparation and attention to detail. By following the steps outlined in this guide, you can ensure that your gun drill is executed safely and accurately.
First and foremost, it’s crucial to select the right tool for the job. Make sure that you choose a gun drill with the appropriate diameter and length for your project. Additionally, be sure to set up your mill and workpiece correctly to ensure that the drill is aligned properly.
Once you’ve taken these steps, it’s time to begin the drilling process. Remember to start with a low speed and gradually increase it as the drill penetrates deeper into the material. And always keep a close eye on the drill to ensure that it’s operating smoothly and without any issues.
By following these guidelines, you can hold a successful gun drill in a CNC mill and achieve the results you’re looking for. With practice and experience, you’ll be able to refine your technique and take on even more complex projects in the future.
Request a quote today!
[contact-form-7 id="1578" title="Contact form"]
Please compress the file into a ZIP or RAR file before uploading. Alternatively, send through your RFQ by email.
enquires@unitymanufacture.com


