Table of Contents
Are you interested in creating intricate patterns with a CNC machine? If you have a printed engraving that you want to turn into a digital pattern, you can achieve this with a few simple steps. In this article, we will guide you through the process of turning your printed engraving into a CNC pattern, allowing you to create beautiful and complex designs with ease.
With the rise of CNC machines, the possibilities for creating intricate designs have become endless. However, it can be challenging to create a digital pattern from a printed engraving. But fear not, with our step-by-step guide, you can easily transform your printed engraving into a digital pattern that can be used with a CNC machine. Whether you’re a hobbyist or a professional, this guide will help you take your designs to the next level. So, let’s get started!
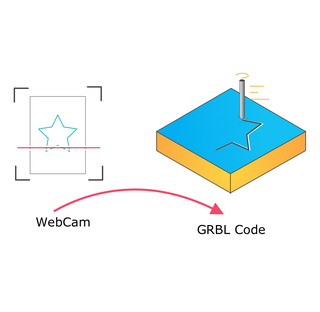
- Scan the engraving and save it as a digital file.
- Import the digital file into a CAD/CAM software.
- Trace the outlines of the engraving using the software’s drawing tools.
- Define the toolpath for the CNC machine to follow.
- Export the final pattern as a G-code file.
How to Turn a Printed Engraving Into a CNC Pattern?
Are you tired of manually creating CNC patterns from scratch? Well, you’re in luck! With the right tools and techniques, you can easily turn a printed engraving into a CNC pattern. In this article, we’ll guide you through the step-by-step process of converting an engraving into a CNC pattern.
Step 1: Scan the Engraving
The first step in the process is to scan the engraving. Use a high-resolution scanner to get a clear image of the engraving. Once you have the scan, save it in a file format that is compatible with your CNC software.
Benefits of Scanning:
– Scanning ensures that you have a high-quality image to work with
– It saves time and effort compared to manually tracing the engraving
– You can easily make adjustments to the scanned image in the CNC software
Step 2: Import the Image Into the CNC Software
Next, you need to import the scanned image into your CNC software. Most CNC software has an image import feature that allows you to upload your scanned image.
Benefits of Importing:
– You can adjust the size and orientation of the image to fit your project
– You can easily trace the image to create a CNC pattern
– It saves time compared to manually drawing the pattern from scratch
Step 3: Trace the Image
Now that you have the image in the CNC software, you can begin tracing it to create a CNC pattern. Use the tracing tool in the software to outline the different elements of the engraving.
Benefits of Tracing:
– You can create a precise and accurate CNC pattern
– It saves time compared to manually drawing the pattern from scratch
– You can easily make adjustments to the pattern as needed
Step 4: Add Toolpaths
Once you have traced the image, you need to add toolpaths to the pattern. Toolpaths are instructions that tell the CNC machine how to cut the material.
Benefits of Toolpaths:
– They ensure that the CNC machine cuts the material accurately
– They save time by automating the cutting process
– You can easily adjust the toolpaths to fit your project
Step 5: Test the Pattern
Before you begin cutting the material, it’s important to test the pattern. Use a piece of scrap material to make a test cut and ensure that the CNC machine is cutting the pattern accurately.
Benefits of Testing:
– It ensures that the final product is accurate and precise
– It saves time and materials by catching errors early on
– You can make adjustments to the pattern as needed before cutting the final material
Step 6: Cut the Material
Once you’ve tested the pattern, you can begin cutting the final material. Use the CNC machine to cut the pattern according to the toolpaths you created.
Benefits of Cutting:
– It ensures that the final product is accurate and precise
– It saves time compared to manually cutting the material
– You can easily replicate the pattern for future projects
Step 7: Sand and Finish the Final Product
After cutting the material, you need to sand and finish the final product. Use sandpaper and a finishing product to smooth out any rough edges and give the product a polished look.
Benefits of Sanding and Finishing:
– It gives the final product a professional and polished look
– It ensures that the product is smooth and free of rough edges
– You can customize the finish to fit the project
Step 8: Clean Up
Finally, it’s time to clean up your workspace. Remove any scraps and debris from the cutting area and store your tools and materials in their proper place.
Benefits of Cleaning Up:
– It ensures that your workspace is safe and organized
– It saves time by making it easier to find tools and materials for future projects
– It helps prolong the life of your tools and materials
Conclusion
Turning a printed engraving into a CNC pattern is a straightforward process that can save you time and effort. By following the steps outlined in this article, you can easily create a CNC pattern from a scanned image of an engraving. Whether you’re a professional woodworker or a DIY enthusiast, this technique can help you create precise and accurate CNC patterns for your projects.
frequently Asked Questions
Here are some frequently asked questions about turning a printed engraving into a CNC pattern:
Question 1: What is a Printed Engraving?
A printed engraving is a design that has been transferred onto paper or another substrate using an engraving technique. The resulting design is typically a high-quality, detailed image that can be used for a variety of purposes, including creating a CNC pattern.
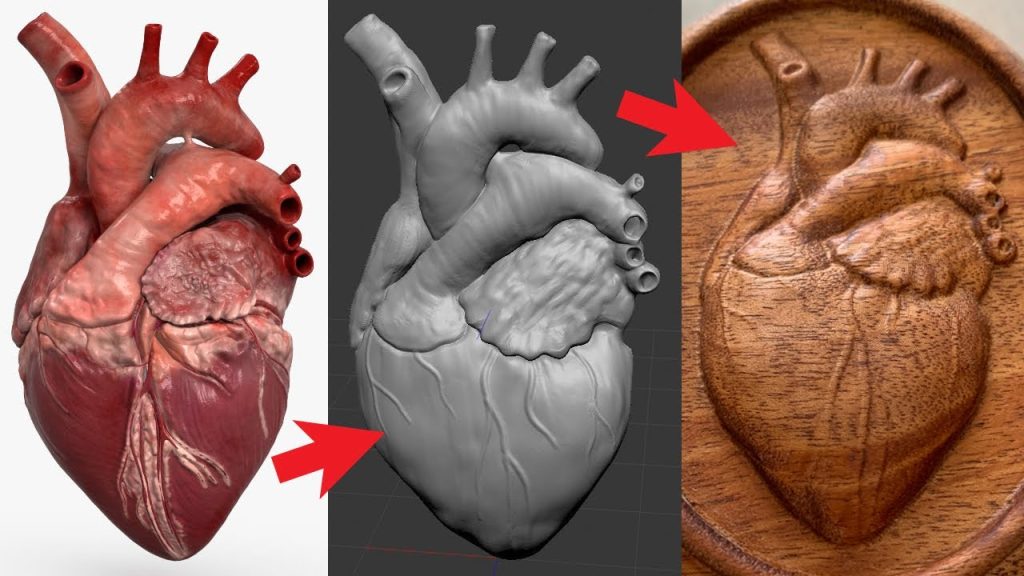
To turn a printed engraving into a CNC pattern, you first need to digitize the design. This can be done using a scanner or a camera, and then importing the resulting image into a CAD program, where it can be cleaned up and converted into a vector-based design.
Question 2: What is a CNC Pattern?
A CNC pattern is a digital file that contains the instructions for a CNC machine to carve or cut out a design from a material, such as wood, metal, or plastic. These patterns are used in a wide range of industries, from woodworking and metalworking to automotive and aerospace.
To create a CNC pattern from a printed engraving, you will need to use a CAD program to convert the design into a vector-based format, which can then be exported as a DXF or other CNC-compatible file type.
Question 3: What CAD Programs are Best for Creating CNC Patterns?
There are many CAD programs available that can be used to create CNC patterns, but some of the most popular include AutoCAD, Fusion 360, SolidWorks, and SketchUp. Each program has its own strengths and weaknesses, so it is important to choose the one that best suits your needs and skill level.
When creating a CNC pattern from a printed engraving, it is important to choose a CAD program that is capable of converting the design into a vector-based format, as this will ensure that the resulting pattern is accurate and can be used by a CNC machine.
Question 4: What Materials Can be Used with CNC Patterns?
CNC patterns can be used to carve or cut a wide range of materials, including wood, metal, plastic, and composites. The type of material you choose will depend on the intended use of the finished product, as well as the capabilities of your CNC machine.
When creating a CNC pattern from a printed engraving, it is important to consider the material you will be using and adjust the design accordingly. For example, if you are carving a wooden sign, you may need to adjust the depth and spacing of the cuts to ensure that the design is clear and easy to read.
Question 5: What Skills Do I Need to Create a CNC Pattern from a Printed Engraving?
To create a CNC pattern from a printed engraving, you will need to have some basic computer skills, as well as an understanding of CAD software and CNC machines. It is also helpful to have some knowledge of engraving techniques and design principles.
If you are new to CNC machining, it may be helpful to take a course or work with an experienced mentor who can help guide you through the process of creating a CNC pattern from a printed engraving.
In conclusion, turning a printed engraving into a CNC pattern can seem like a daunting task, but with the right tools and techniques, it can be a rewarding and creative process. By following these steps, you can transform your engraved design into a precise and accurate digital pattern that can be used for a variety of purposes.
First, scan the engraving at a high resolution and use image editing software to clean up any imperfections or distortions. Next, import the image into a CAD program and use tracing tools to create a vector-based pattern. Finally, convert the vector file into a format that is compatible with your CNC machine and prepare it for cutting.
By taking the time to carefully plan and execute each step of the process, you can ensure that your CNC pattern accurately reflects the original engraving and meets your specific needs. Whether you are creating a custom piece of jewelry or a unique home decor item, the possibilities are endless with CNC technology. So why not give it a try and see where your creativity takes you?
Request a quote today!
[contact-form-7 id="1578" title="Contact form"]
Please compress the file into a ZIP or RAR file before uploading. Alternatively, send through your RFQ by email.
enquires@unitymanufacture.com


