Table of Contents
- How to Turn a Radius on a CNC Lathe?
- Step 1: Choose the Right Tooling
- Step 2: Set the Tool Height
- Step 3: Set the Tool Nose Radius
- Step 4: Set the Cutting Speed and Feed Rate
- Step 5: Start Cutting
- Step 6: Check the Radius
- Step 7: Repeat the Process
- Step 8: Benefits of Turning a Radius on a CNC Lathe
- Step 9: Turning a Radius on a CNC Lathe vs. Doing it by Hand
- Step 10: Conclusion
- Frequently Asked Questions
Turning a radius on a CNC lathe might seem like a daunting task at first, but with the right techniques and tools, it can be a simple and efficient process. Whether you’re a seasoned CNC operator or just starting out, mastering the art of radius turning is an essential skill that will take your machining abilities to the next level.
In this guide, we’ll explore the steps involved in turning a radius on a CNC lathe, from selecting the right tooling to programming the machine for optimal results. You’ll learn about the different types of radius turning tools, how to calculate the correct cutting parameters, and how to troubleshoot common issues that may arise during the process. So buckle up, grab your lathe, and let’s get started!
- Choose the appropriate tool and insert it into the tool holder.
- Set the tool height to the centerline of the workpiece.
- Select the radius turning option on your CNC lathe.
- Enter the desired radius value and the starting point of the curve on the control panel.
- Set the cutting speed, feed rate, and depth of cut according to the material being turned.
- Run a test cut to check for accuracy and adjust the settings if necessary.
- Begin the radius turning process, ensuring that the tool is in contact with the workpiece at all times.
- Monitor the cutting process and make any necessary adjustments until the desired radius is achieved.
How to Turn a Radius on a CNC Lathe?
Are you looking for a way to turn a radius on a CNC lathe? If so, you have come to the right place. In this article, we will provide you with a step-by-step guide on how to turn a radius on a CNC lathe. Whether you are a beginner or an experienced CNC lathe operator, this guide will help you achieve the perfect radius every time.
Step 1: Choose the Right Tooling
The first step to turning a radius on a CNC lathe is to choose the right tooling. You will need a tool with a radius that matches the size of the radius you want to turn. There are several types of tools that you can use to turn a radius, including:
- Carbide insert tools
- HSS (High-Speed Steel) tools
- Brazed carbide tools
Each tool has its own advantages and disadvantages, so it’s important to choose the right one for the job.
Step 2: Set the Tool Height
Once you have chosen the right tool, the next step is to set the tool height. The tool height is the distance between the centerline of the lathe and the top of the tool. This is important because it determines the size of the radius you can turn.
To set the tool height, you will need to use a height gauge or a tool height setter. Place the gauge on the lathe bed and adjust the tool until it is at the correct height.
Step 3: Set the Tool Nose Radius
The next step is to set the tool nose radius. This is the radius on the tip of the tool that will actually cut the material. To set the tool nose radius, you will need to use a radius gauge. Place the gauge against the tool and adjust the tool until the radius matches the size you want to turn.
Step 4: Set the Cutting Speed and Feed Rate
Before you start cutting, you will need to set the cutting speed and feed rate. The cutting speed is the speed at which the tool rotates, while the feed rate is the speed at which the tool moves along the material.
To set the cutting speed and feed rate, you will need to refer to the material specifications. These specifications will tell you the recommended cutting speed and feed rate for the material you are working with.
Step 5: Start Cutting
Now that you have set up the lathe and the tool, it’s time to start cutting. Make sure that the material is secured tightly in the lathe chuck and that the lathe is set to the correct speed and feed rate.
Slowly move the tool towards the material and begin cutting the radius. Take your time and make sure that the tool is cutting smoothly and evenly.
Step 6: Check the Radius
Once you have finished cutting the radius, it’s important to check it to make sure that it is the correct size and shape. Use a radius gauge to measure the radius and compare it to the size you wanted to turn. If the radius is not the correct size or shape, you may need to make adjustments to the tool or the lathe settings.
Step 7: Repeat the Process
If you need to turn multiple radii, you can repeat the process for each one. Make sure to adjust the tool height and nose radius for each radius to ensure that they are the correct size and shape.
Step 8: Benefits of Turning a Radius on a CNC Lathe
There are several benefits to turning a radius on a CNC lathe. First, it allows you to create precise and consistent radii every time. This is important for parts that need to fit together perfectly.
Second, turning a radius on a CNC lathe is much faster and more efficient than doing it by hand. This saves time and money, especially for large production runs.
Step 9: Turning a Radius on a CNC Lathe vs. Doing it by Hand
While it is possible to turn a radius by hand, it is much more difficult and time-consuming. Doing it by hand also increases the risk of errors and inconsistencies, which can lead to parts that do not fit together properly.
Turning a radius on a CNC lathe is much easier and more precise. With the right tooling and lathe settings, you can create perfect radii every time, with minimal effort.
Step 10: Conclusion
In conclusion, turning a radius on a CNC lathe is a simple process that can be done with the right tooling and lathe settings. By following the steps outlined in this guide, you can create precise and consistent radii every time, with minimal effort. Remember to choose the right tool, set the tool height and nose radius, and adjust the cutting speed and feed rate for the material you are working with. With these tips in mind, you will be able to turn perfect radii on your CNC lathe in no time.
Frequently Asked Questions
Here are some common questions and answers regarding how to turn a radius on a CNC lathe:
What is a CNC lathe?
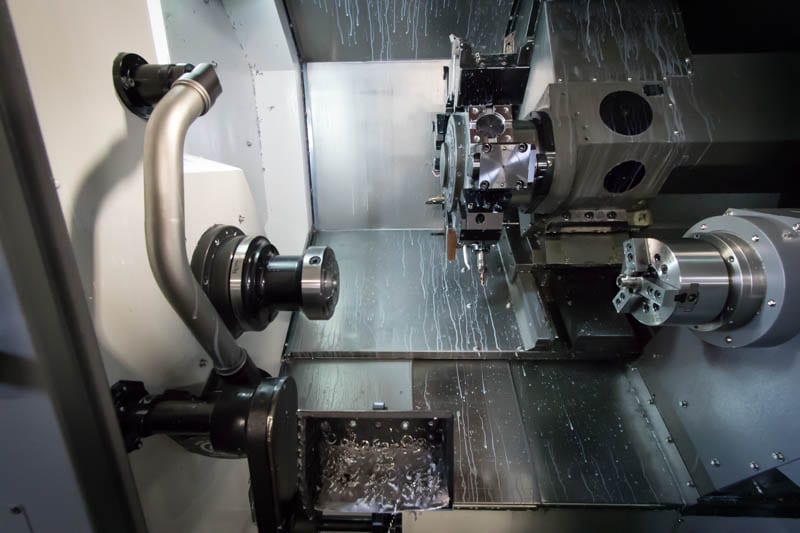
A CNC lathe is a machine tool used to shape materials, such as metal or wood, by rotating them while a cutting tool moves along a specific path. The machine is controlled by a computer program, which allows for precise and consistent results.
There are various types of CNC lathes, including horizontal and vertical lathes, as well as those with multiple axes for more complex operations.
How do you set up a CNC lathe to turn a radius?
To turn a radius on a CNC lathe, you must first select the appropriate cutting tool and insert it into the tool holder. Next, you will need to program the lathe with the correct tool path and cutting parameters, such as speed and depth of cut.
You may also need to adjust the lathe’s controls, such as the spindle speed and feed rate, to achieve the desired results. Additionally, it’s important to ensure the material is securely held in place to prevent movement during the cutting process.
What are some common techniques for turning a radius on a CNC lathe?
One common technique for turning a radius on a CNC lathe is to use a tool with a radius tip, which allows for a smooth and consistent cut. Another technique is to use a series of straight cuts to create the desired curve, which requires more programming and precision.
You can also use a combination of both techniques, as well as adjust the cutting parameters to achieve the desired finish, such as a smooth or textured surface.
What are some tips for maintaining a CNC lathe when turning a radius?
Maintaining a CNC lathe is crucial for achieving accurate and consistent results when turning a radius. This includes regularly cleaning and lubricating the machine, as well as replacing worn or damaged parts as needed.
You should also regularly inspect the cutting tools and adjust the programming and cutting parameters as necessary to ensure optimal performance. Finally, it’s important to follow all safety protocols when operating the machine, including wearing appropriate protective gear and avoiding distractions.
What are some common mistakes to avoid when turning a radius on a CNC lathe?
One common mistake when turning a radius on a CNC lathe is using the wrong cutting tool or incorrect tool path, which can result in uneven or inaccurate cuts. Another mistake is not properly securing the material, which can lead to movement and errors in the finished product.
It’s also important to avoid rushing the process and not taking the time to properly program and adjust the machine settings. Finally, failing to properly maintain the machine can lead to decreased performance and potential safety hazards.
In conclusion, turning a radius on a CNC lathe may seem daunting at first, but with the right tools and techniques, it can become a straightforward process. By following the steps outlined in this guide and taking the time to properly set up your lathe, you can create accurate and precise radius cuts on a variety of materials.
Remember to always prioritize safety when using a CNC lathe, and don’t hesitate to ask for help or advice from more experienced machinists. With practice and patience, you can master the art of turning radii and take your machining skills to the next level.
So why not give it a try? Take your CNC lathe skills to the next level by experimenting with radius cuts and exploring the endless possibilities of this versatile machine. Who knows? You may just discover a new passion for precision machining and the art of turning.
Request a quote today!
[contact-form-7 id="1578" title="Contact form"]
Please compress the file into a ZIP or RAR file before uploading. Alternatively, send through your RFQ by email.
enquires@unitymanufacture.com


