Table of Contents
- How to Make CNC Laser Engraver at Home?
- Step 1: Gather Materials
- Step 2: Assemble the Laser Diode and Stepper Motors
- Step 3: Install the Arduino Board and Laser Driver
- Step 4: Add a Z-Axis
- Step 5: Calibrate the Machine
- Step 6: Choose the Right Software
- Step 7: Start Engraving
- Benefits of Making Your Own CNC Laser Engraver
- CNC Laser Engraver vs Traditional Engraving Methods
- Freequently Asked Questions
Are you interested in creating your own CNC laser engraver at home? Look no further! In this article, we will guide you through the necessary steps to build your very own CNC laser engraver. With just a few tools and materials, you’ll be well on your way to designing and engraving your own personalized creations.
Whether you’re a hobbyist, a DIY enthusiast, or a small business owner looking to expand your capabilities, creating your own CNC laser engraver can be a fun and rewarding experience. Not only will you have the satisfaction of building something yourself, but you’ll also have the ability to produce high-quality engravings on a variety of materials. So, let’s get started on building your own CNC laser engraver!
- Step 1: Gather all the materials required to build a CNC laser engraver.
- Step 2: Assemble the laser engraver frame and install the stepper motors and controller board.
- Step 3: Install the laser module and connect it to the controller board.
- Step 4: Install the software on your computer and calibrate the CNC laser engraver.
- Step 5: Start engraving your designs on various materials like wood, plastic, and metal.
Note: Building and operating a CNC laser engraver requires technical expertise and safety precautions. Ensure that you take all necessary precautions and follow the instructions carefully to avoid any accidents.
How to Make CNC Laser Engraver at Home?
Are you interested in creating your own CNC laser engraver right in the comfort of your own home? Look no further! With the right tools and materials, you can easily make a CNC laser engraver that can be used for engraving on various materials such as wood, metal, and plastic. In this article, we will guide you through the process of making a CNC laser engraver step-by-step.
Step 1: Gather Materials
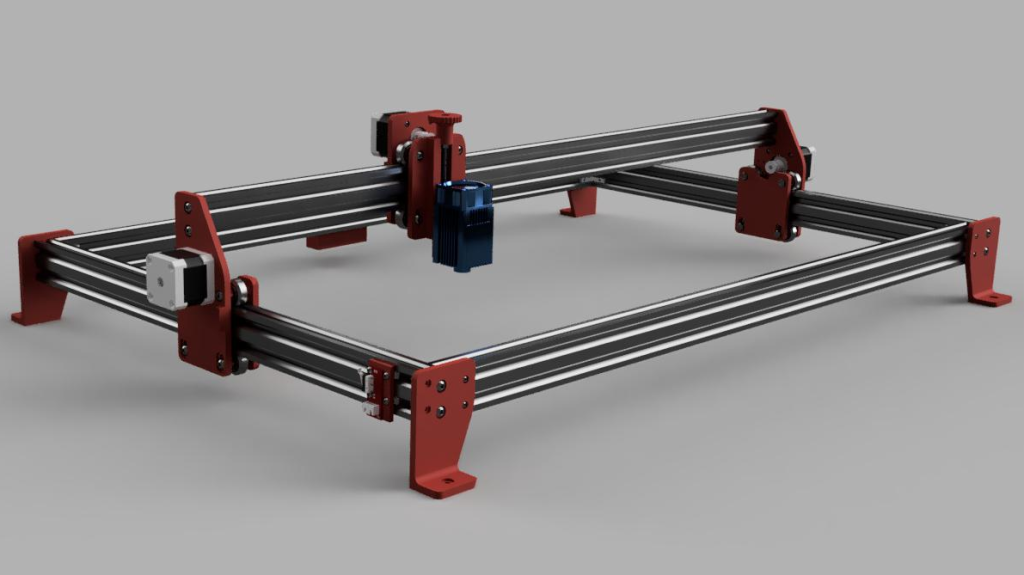
The first step in making your own CNC laser engraver is gathering all the necessary materials. You will need a laser diode, two stepper motors, an Arduino board, a heat sink, a laser driver, and a few other tools such as a soldering iron and wire cutters. Additionally, you will need a frame to hold all the parts together.
Once you have gathered all the materials, you can start assembling the frame. The frame should be sturdy enough to hold all the parts in place and to withstand the vibrations caused by the motors.
Step 2: Assemble the Laser Diode and Stepper Motors
Next, you will need to assemble the laser diode and stepper motors. Start by attaching the laser diode to the heat sink and mounting it onto the frame. Then, connect the stepper motors to the frame and attach them to the laser diode. Make sure to connect the wires properly and use heat shrink tubing to protect them.
Step 3: Install the Arduino Board and Laser Driver
Once the laser diode and stepper motors are in place, it’s time to install the Arduino board and laser driver. Connect the Arduino board to the stepper motors and the laser driver. Then, upload the necessary software to the Arduino board and test the system.
Step 4: Add a Z-Axis
To make the CNC laser engraver more versatile, you can add a Z-axis to the machine. This will allow you to adjust the height of the laser diode and engrave on materials of different thicknesses. You can either buy a pre-made Z-axis or make one yourself using a linear actuator and a few other parts.
Step 5: Calibrate the Machine
Before you start using your CNC laser engraver, you need to calibrate the machine. This involves setting the correct focus and power levels for the laser diode. You can do this by running a few test engravings on different materials and adjusting the settings accordingly.
Step 6: Choose the Right Software
To control your CNC laser engraver, you will need to use the right software. There are several options available such as LaserGRBL, Grbl Controller, and LightBurn. Each software has its own pros and cons, so make sure to choose the one that best suits your needs.
Step 7: Start Engraving
With everything set up and calibrated, you can now start using your CNC laser engraver. Make sure to follow all the safety precautions such as wearing protective eyewear and avoiding flammable materials. You can use your CNC laser engraver to engrave on various materials such as wood, metal, and plastic.
Benefits of Making Your Own CNC Laser Engraver
Making your own CNC laser engraver has several benefits. Firstly, it’s a fun and challenging DIY project that allows you to learn new skills and techniques. Secondly, it’s a cost-effective way to get a CNC laser engraver as commercial ones can be quite expensive. Lastly, you have complete control over the machine and can customize it to your liking.
CNC Laser Engraver vs Traditional Engraving Methods
CNC laser engraving has several advantages over traditional engraving methods such as hand engraving and rotary engraving. Firstly, it’s much faster and more precise as it uses a computer-controlled laser beam. Secondly, it can engrave on a wider range of materials and can create more intricate designs. Lastly, it’s more cost-effective in the long run as it requires less maintenance and produces less waste.
In conclusion, making your own CNC laser engraver can be a challenging but rewarding DIY project. By following the steps outlined in this article, you can create a CNC laser engraver that can be used for engraving on various materials. Remember to follow all the safety precautions and have fun!
Freequently Asked Questions
Here are some answers to common questions about making a CNC laser engraver at home:
What is a CNC laser engraver?
A CNC laser engraver is a machine that uses a laser to etch designs or patterns onto a variety of materials. These machines can be used for a variety of applications, including engraving logos on promotional items, creating custom jewelry, and even cutting out intricate designs from wood or metal.
To make a CNC laser engraver at home, you will need a few key components, including a laser module, a control board, and a frame to hold everything together. You will also need software to control the machine and create designs to be engraved.
What materials can be engraved with a CNC laser engraver?
A CNC laser engraver can be used to etch designs onto a wide range of materials, including wood, acrylic, leather, paper, and metal. The type of material that you choose will depend on the type of laser module that you use, as well as the power of the laser and the speed at which it operates.
When choosing materials for your CNC laser engraver, it is important to consider the thickness and density of the material, as well as the complexity of the design that you want to create. Thicker materials may require a more powerful laser, while more intricate designs may require a slower speed to ensure precision.
What are some tips for using a CNC laser engraver?
When using a CNC laser engraver, it is important to take safety precautions to prevent injury or damage to the machine. Always wear protective eyewear and gloves when operating the machine, and be sure to follow the manufacturer’s instructions for setting up and using the machine.
It is also important to start with simple designs and materials when first learning how to use a CNC laser engraver. This will help you get a feel for how different materials and settings affect the outcome of your designs, and will allow you to gradually build your skills and confidence as you work with more complex projects.
How much does it cost to build a CNC laser engraver at home?
The cost of building a CNC laser engraver at home will depend on the quality of the components that you choose, as well as the size and complexity of the machine that you want to build. Basic machines can be built for as little as a few hundred dollars, while more advanced machines can cost several thousand dollars.
When budgeting for your CNC laser engraver, be sure to factor in the cost of components such as the laser module, control board, and frame, as well as any tools or software that you may need to purchase. You may also want to consider the cost of any upgrades or maintenance that may be required over time.
Where can I find resources for building a CNC laser engraver at home?
There are many resources available online for building a CNC laser engraver at home, including tutorials, forums, and online communities dedicated to DIY projects. Some popular resources include YouTube channels, maker websites, and online marketplaces for purchasing components and tools.
When researching resources for building your CNC laser engraver, be sure to read reviews and compare prices and features to find the best options for your needs and budget. You may also want to reach out to other DIY enthusiasts for advice and support as you work on your project.
In conclusion, creating your own CNC laser engraver at home is a fun and exciting project that can be accomplished with the right tools and knowledge. With the help of a few online tutorials and some dedicated effort, you can have your own custom-made engraver up and running in no time.
Not only is building your own CNC laser engraver a rewarding experience, but it also allows you to have complete control over the process. You can customize the machine to meet your specific needs and preferences, ensuring that it operates exactly as you want it to.
So, whether you’re a hobbyist looking to expand your skillset or a professional looking to save money on expensive equipment, building a CNC laser engraver at home is a fantastic option. With a bit of perseverance and a willingness to learn, you can create a powerful and reliable tool that will serve you well for years to come.
Request a quote today!
[contact-form-7 id="1578" title="Contact form"]
Please compress the file into a ZIP or RAR file before uploading. Alternatively, send through your RFQ by email.
enquires@unitymanufacture.com


